Creating a crypto wallet may sound technical, but the basic process is straightforward. You choose a reputable wallet, download it from an official source, create a new account, secure its recovery method, and copy the correct address for the cryptocurrency you want to receive.
The entire setup can take less than 15 minutes. However, there is one important difference between opening a crypto wallet and creating an ordinary online account: with a self-custody wallet, you are responsible for protecting access to your assets.
There may be no bank, password-reset department, or customer support team capable of reversing a completed blockchain transaction. That is why security matters just as much as convenience.
This guide explains how to create a crypto wallet safely, Hot Wallet vs Cold Wallet, choose between different wallet types, crypto wallet mistakes, protect your recovery information, and complete your first small test transfer.
Want to start crypto trading? Open a crypto account with Delta Exchange India.

What Is a Crypto Wallet?
A crypto wallet does not hold digital coins in the same way a physical wallet holds cash. Cryptocurrency records remain on a blockchain.
The wallet manages the cryptographic information that allows you to view balances, receive assets, and authorize outgoing transactions. In a traditional self-custody wallet, this access is controlled through private keys and often backed up through a recovery phrase.
A helpful way to understand it is:
- Your wallet address is similar to an account number that can be shared.
- Your private key or recovery credential is the sensitive information that controls access.
- The blockchain is the public system that records the balance and transaction history.
Anyone who obtains your private key or recovery phrase may be able to control the related assets. MetaMask, for example, describes its Secret Recovery Phrase as the foundation of the wallet and warns that anyone who controls it can control the associated accounts. (MetaMask Help Center)
How Do You Create a Crypto Wallet?
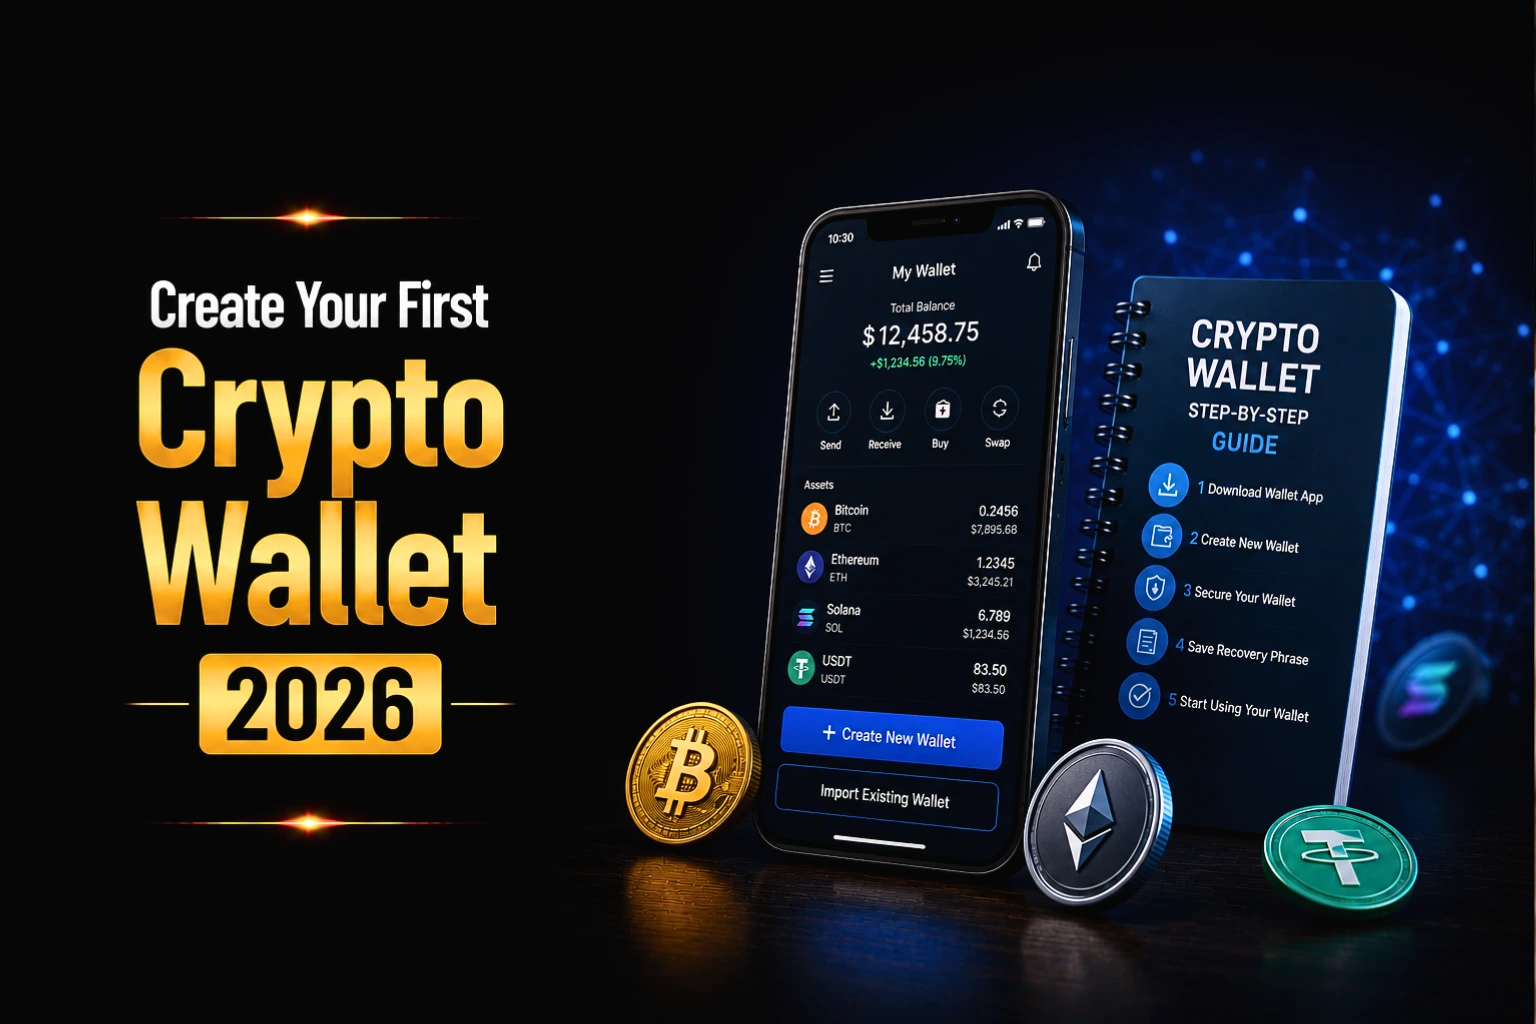
To create a crypto wallet:
- Decide which cryptocurrency and blockchain network you want to use.
- Choose a reputable custodial or self-custody wallet.
- Download the wallet only from its official website or verified app-store listing.
- Select “Create New Wallet” or the equivalent option.
- Create a strong PIN or password.
- Secure the recovery method provided by the wallet.
- Find the receiving address for the correct asset and network.
- Send a small test transaction before transferring a larger amount.
Depending on the wallet, recovery may use a 12- or 24-word phrase, a passkey, an encrypted cloud-based system, or another account-recovery method. Always follow the provider’s current official setup instructions.
Custodial vs Non-Custodial Wallets
Before comparing hot and cold wallets, you need to decide who will control the keys.
|
Feature |
Custodial Wallet |
Non-Custodial Wallet |
|
Who controls the keys? |
A company or exchange |
The wallet user |
|
Account recovery |
Usually handled through the provider |
Depends on the wallet’s recovery method |
|
Ease of use |
Usually simpler for beginners |
Requires more personal responsibility |
|
Control over assets |
Provider controls access infrastructure |
User controls access |
|
Main risk |
Provider failure, restrictions, or account compromise |
Loss or theft of recovery credentials |
|
Typical example |
Exchange account |
Self-custody mobile or hardware wallet |
Custodial wallet
With a custodial wallet, a third-party company manages the private keys on your behalf. You normally access the account using an email address, password and security verification.
This can be easier for a beginner, but your access depends partly on the provider’s systems, policies and security.
Non-custodial wallet
A non-custodial or self-custody wallet gives you direct responsibility for the recovery information and transaction approvals.
This provides greater control, but it also means that losing the recovery method may result in permanent loss of access.
A non-custodial wallet is not automatically safer in every situation. Its security depends on how carefully the user protects the device, password, recovery information, and transaction details.
Hot Wallet vs Cold Wallet
Hot wallet and cold wallet describe how the wallet’s signing keys are stored and accessed.
|
Feature |
Hot Wallet |
Cold Wallet |
|
Internet connection |
Used on an internet-connected device |
Keys remain offline during normal storage |
|
Common form |
Mobile app, browser extension or desktop app |
Dedicated hardware wallet |
|
Convenience |
Faster for frequent use |
Requires an additional device or confirmation |
|
Suitable for |
Learning, small balances and regular transactions |
Longer-term storage and larger balances |
|
Main risk |
Malware, phishing and device compromise |
Physical loss, damaged backups or incorrect setup |
|
Cost |
Often free |
Usually requires buying a device |
A hot wallet is convenient for regular transactions, while cold storage reduces exposure to many online threats. Bitcoin.org recommends keeping only smaller everyday amounts in internet-connected wallets and considering safer offline storage for savings. (Bitcoin)
However, a hardware wallet is not completely risk-free. It still depends on proper setup, safe recovery backups, and careful transaction verification.
How to Choose a Crypto Wallet
Do not select a wallet only because it appears first in a search result or is promoted by an influencer.
Compare the following factors first.
1. Supported cryptocurrencies
Check whether the wallet supports the assets you intend to use, such as:
- Bitcoin
- Ethereum
- Solana
- Stablecoins
- Tokens on Ethereum-compatible networks
A wallet that supports Ethereum does not necessarily support native Bitcoin or Solana transactions.
2. Supported networks
The same asset may exist on multiple networks. For example, a stablecoin could be available on Ethereum, Polygon, Base, Solana, or another blockchain.
Confirm that both the sending and receiving services support the same network.
3. Recovery method
Depending on the wallet, recovery may involve:
- A 12-word recovery phrase
- A 24-word recovery phrase
- A passkey
- A hardware-device backup
- Encrypted account-based recovery
- Multi-party computation, or MPC
Do not assume that every wallet uses the same backup process.
4. Security model
Check:
- Whether the wallet is custodial or non-custodial
- Whether transaction details can be verified
- Whether independent security audits are available
- Whether biometric or device-level protection is supported
- Whether the wallet can connect to a hardware device
5. Platform availability
Choose a wallet that works on the device you actually use:
- Android
- iPhone
- Desktop
- Browser extension
- Hardware device
6. Reputation and official documentation
Review the wallet’s official security documentation, update history and support resources.
Wallet names commonly encountered by beginners include MetaMask, Trust Wallet, Exodus, Ledger and Trezor. These are examples, not automatic recommendations. Features, recovery options, supported networks and geographic availability can change, so verify current information directly with the provider.
Create a Crypto Wallet Step by Step
The exact buttons may differ between wallets, but the general process is similar.
Step 1: Decide What You Want to Use the Wallet For
Start by answering three questions:
- Which cryptocurrency do you want to hold?
- Which blockchain network will you use?
- Do you need the wallet for regular transactions or long-term storage?
For example, someone who only wants to hold Bitcoin may prefer a Bitcoin-focused wallet. Someone who plans to use Ethereum applications may require an Ethereum-compatible wallet.
Choosing the network first helps prevent you from downloading a wallet that does not support your intended asset.
Step 2: Download the Wallet from an Official Source
Fake wallet applications and imitation websites are common phishing methods.
To reduce this risk:
- Type the wallet’s verified website address directly into your browser.
- Use the official website’s app-store link when available.
- Check the developer or publisher name.
- Review the app’s update history.
- Avoid clicking wallet-download links in advertisements, emails or direct messages.
- Do not install unofficial browser extensions or modified applications.
Bookmark the official support page after installation so you do not need to search for it later.
Step 3: Select “Create a New Wallet”
Open the application and choose the option to create a new wallet. Do not select “Import Wallet” unless you already have a valid recovery phrase or private key that you intentionally want to restore.
During this step, the wallet may ask you to:
- Accept its terms
- Choose a privacy setting
- Create a username
- Set an app password
- Create a PIN
- Enable biometric access
Read each screen rather than clicking through automatically.
Step 4: Create a Strong Password or PIN
Use a password that is:
- Unique to the wallet
- Not reused on another website
- Difficult to guess
- Long enough to resist basic password attacks
A wallet password may only protect access on the current device. It may not replace the recovery phrase or other backup method.
For example, in a traditional MetaMask recovery-phrase setup, the password unlocks the wallet on that device, while the Secret Recovery Phrase is used to restore it. MetaMask also supports other account-based setup options, so users should confirm which recovery model they selected. (MetaMask Help Center)
Step 5: Secure the Recovery Method
This is the most important part of the crypto wallet setup process.
If the wallet provides a recovery phrase:
- Write each word in the correct order.
- Check the spelling carefully.
- Store the phrase somewhere private and offline.
- Protect it from theft, fire, water, and accidental disposal.
- Never share it with customer support, friends, or online contacts.
- Never enter it into an unknown website or form.
Avoid storing a recovery phrase in:
- Screenshots
- Email drafts
- Cloud notes
- Messaging applications
- Unencrypted computer files
- Public or shared password documents
Ledger’s current security guidance states that its 24-word recovery phrase should remain offline and should never be shared with anyone, including anyone claiming to represent support. (Ledger Support)
Do not divide the words, change their order, or invent your own storage method without understanding the recovery risks. A complicated backup that you cannot restore correctly may be as dangerous as having no backup.
Step 6: Complete the Backup Verification
Many wallets ask you to confirm selected recovery words or complete another verification step. Do not skip this process.
Check that:
- Every word is readable
- Every word is in the correct position
- The backup belongs to the wallet you just created
- No camera or screen-recording tool captured the phrase
- Nobody else was able to view it.
Never test a recovery phrase by entering it into a random website. Use only the wallet’s verified recovery process or official documentation.
Step 7: Find Your Receiving Address
After the wallet is created, select the cryptocurrency you want to receive and tap or click Receive.
The wallet will display an address, usually as:
- A long series of letters and numbers
- A QR code
- A human-readable wallet name, where supported
Different cryptocurrencies use different address formats. A Bitcoin address may look different from an Ethereum or Solana address.
Your public receiving address can normally be shared. Your private key and recovery phrase must remain private.
Step 8: Confirm the Asset and Network
Before transferring any cryptocurrency, confirm all four details:
- The asset
- The blockchain network
- The receiving address
- Whether a memo or destination tag is required
The sending platform and receiving wallet must support the same network.
For example, selecting an Ethereum address does not mean that every asset from every blockchain can be sent to it. Sending tokens through an incompatible network can make recovery difficult or impossible.
MetaMask notes that assets sent to the wrong EVM-compatible network may sometimes be recoverable by switching networks, while transfers involving incompatible non-EVM networks may be permanently inaccessible. (MetaMask Help Center)
Do not rely on the fact that two addresses look similar. Confirm network compatibility through the official documentation of both services.
Step 9: Send a Small Test Transaction
Before sending a large amount, transfer the smallest practical test amount. After sending it:
- Wait for the transaction to be confirmed.
- Check that it appears in the receiving wallet.
- Confirm the asset and network.
- Review the transaction using the appropriate blockchain explorer.
- Transfer the remaining amount only after verifying the test.
Blockchain transactions are generally irreversible once confirmed. Coinbase’s official wallet guidance recommends double-checking the address and sending a small test amount before transferring a significant amount. (Coinbase Help)
Remember that sending two transactions may mean paying two network fees.
Step 10: Verify the Final Transaction
Before approving a transaction, review:
- Recipient address
- Network
- Asset
- Amount
- Network fee
- Total deduction
Do not approve a transaction when:
- The address has changed after pasting
- The network is unfamiliar
- The fee looks unusual
- The wallet asks for your recovery phrase
- A website creates unexpected approval requests
Clipboard malware can replace a copied wallet address. Hardware-wallet users should verify transaction details on the hardware device’s own screen rather than relying only on the computer or phone display. (Trezor)
Crypto Wallet Fees Explained
Creating a software wallet is often free, but using a blockchain is not always free.
A transaction may include:
- Network or miner fees
- Validator fees
- Wallet service fees
- Swap fees
- Card-purchase fees
- Third-party payment-provider charges
The wallet provider does not necessarily keep the blockchain network fee.
On Ethereum, transaction fees are called gas fees. They are paid in ETH and can change according to network activity and the complexity of the transaction. Wallets generally estimate the fee before the user approves the transaction. (ethereum.org)
Other networks use different fee systems and native assets. Always keep enough of the network’s required asset available to pay the transaction fee.
Essential Crypto Wallet Security Tips
Creating the wallet is only the beginning. Use these habits to protect it.
Keep recovery information private
No genuine support agent should need your recovery phrase to resolve a routine issue. Anyone requesting it should be treated as a potential scammer.
Keep only necessary funds in a hot wallet
A hot wallet can be useful for regular transactions, but avoid treating it as unlimited long-term storage.
Keep devices updated
Install legitimate wallet updates, browser updates, and operating-system security patches.
Use device security
Enable:
- Screen lock
- Biometric protection
- Wallet PIN
- Strong passwords
- Two-factor authentication for connected custodial accounts
Review website connections
Disconnect decentralized applications that you no longer use. Read wallet prompts before approving token access or smart-contract interactions.
Avoid wallet-support messages
Scammers frequently impersonate support agents through:
- Social-media replies
- Direct messages
- Telegram groups
- Fake emails
- Search advertisements
- Phone calls
Use support links found inside the official application or verified website.
Check transaction details carefully
Do not review only the amount. Confirm the address, network, token, and approval permissions.
Do not discuss your holdings publicly
Sharing exact balances can make you a target for phishing, impersonation, and physical threats.
Common Crypto Wallet Mistakes
Downloading a fake wallet
Always verify the developer, website, and extension publisher.
Sharing the recovery phrase
A recovery phrase should never be shared through chat, email, or a support ticket.
Storing the phrase in a screenshot
Screenshots may be backed up automatically to cloud storage or accessed by a compromised application.
Sending through the wrong network
Confirm that both platforms support the selected network before transferring assets.
Skipping the test transaction
A small test transfer can help identify an incorrect address or network before a larger amount is sent.
Approving unknown smart contracts
Do not approve a request simply because a website says it is required to “verify,” “activate,” or “unlock” the wallet.
Buying a preconfigured hardware wallet
A new hardware wallet should generate its recovery information during your own setup. Ledger states that its recovery sheets should be blank when received and that the recovery phrase should be generated on the device during initialization. (Ledger Support)
Assuming customer support can reverse a transaction
Once a blockchain transaction has been confirmed, cancellation or reversal may not be possible.
When Should You Consider a Hardware Wallet?
A hardware wallet may be worth considering when:
- You plan to hold assets for a long period
- The amount would be financially painful to lose
- You rarely need to make transactions
- You want transaction approval on a separate device
- You understand how to protect a physical recovery backup
There is no universal dollar amount at which everyone must purchase a hardware wallet. The decision should depend on your financial exposure, transaction frequency, technical confidence, and ability to secure the recovery process.
A hardware wallet improves protection against many online threats, but it cannot protect users who:
- Share their recovery phrase
- Approve a malicious transaction
- Use a preconfigured device
- Lose all recovery backups
- Confirm an incorrect address
What Happens If You Lose Your Wallet?
The outcome depends on what was lost.
You lost the phone but have the recovery method
Install the official wallet on a trusted replacement device and follow the verified recovery process.
You forgot the app password but have the recovery phrase
Some wallets allow restoration using the recovery phrase. Follow the wallet’s official instructions.
You lost the recovery phrase but still have access
Do not uninstall or reset the wallet. Review the provider’s official backup guidance immediately and create a valid backup where supported.
You lost both the device and recovery method
For a traditional self-custody wallet, access may be permanently lost.
Someone obtained your recovery phrase
Create a completely new wallet using a trusted device and transfer the assets to the new wallet as soon as safely possible. Do not continue using the compromised recovery phrase.

Conclusion
Learning how to create a crypto wallet is not difficult, but using one responsibly requires attention.
The most important steps are:
- Choose a wallet that supports your intended asset and network.
- Download it only from an official source.
- Protect the recovery method.
- Confirm the receiving address and blockchain network.
- Send a small test transaction.
- Read every approval request before confirming it.
Do not rush because a message, promotion, or support agent creates urgency. A careful five-minute review can prevent a mistake that may be impossible to reverse. Start with a small amount, learn how the wallet works, and build your security process before using it for financially significant assets.

DISCLAIMER: This blog is NOT any buy or sell recommendation. No investment or trading advice is given. The content is only for educational purposes. Always discuss with your SEBI-registered financial advisor for investment-related decisions.